I was in the middle of a chaotic dinner party when the kitchen decided to betray me. A rogue pot of boiling water, a mis‑timed timer, and a stack of eggs that seemed to have a mind of their own left me clutching my apron, wondering if I could salvage anything. That moment sparked a thought: deviled eggs, simple yet spectacular, could be the perfect rescue act. The idea felt like a neon sign flashing in the dim kitchen, promising a quick fix that could still wow the guests.
Picture this: the sizzling sound as the eggs hit the water, the golden glow of the pot, the sharp aroma of boiled whites mingling with the faint scent of fresh herbs. My eyes darted between the simmering pot and the clock, while my hands felt the weight of the future appetizer. I could taste the anticipation already—a creamy, tangy bite that would cut through any blandness. The kitchen was a stage, and the eggs were the stars ready to perform.
I swear, I dared my friends to taste this and not go back for seconds, and they all laughed until they cried. This version of deviled eggs is hands down the best you’ll ever make at home, because it balances richness with a bright zing that lingers on the palate. The secret? A splash of vinegar that wakes up the flavors, a pinch of paprika that gives a subtle smoky note, and a dash of fresh chives that adds a pop of color and freshness. Most recipes get this completely wrong by over‑mashing the yolks or using too much mayo, but not this one. I’m talking about a filling that coats the whites like velvet, with a texture that’s silky but not soggy.
If you’ve ever struggled with deviled eggs—those that look like a sad, dry mess—then you’re not alone. I’ve got the fix, and it involves a simple trick that turns the whole process into a breeze. Picture yourself pulling these out of the pot, the kitchen smelling incredible, the guests reaching for another bite before you even plate them. Stay with me here, because I’m about to walk you through every single step, and by the end, you’ll wonder how you ever made them any other way.
This isn’t just another recipe; it’s a culinary confidence booster. I’ve tested it over dozens of parties, from casual brunches to formal affairs, and the feedback is always the same: “Where did you learn this?” The technique I’m about to reveal will make your deviled eggs the talk of the table, and trust me, you’ll want to keep this one in your pantry of go‑to dishes. Let’s dive in and get cracking.
What Makes This Version Stand Out
- Flavor Fusion: The combination of mayo, mustard, and vinegar creates a creamy base that still has a bright, tangy kick. It’s a balance that keeps each bite exciting. The result is a filling that sings without overpowering.
- Texture Mastery: By mashing the yolks with a fork instead of a blender, you preserve the airy lightness of the eggs. The filling remains silky without becoming gluey. This simple choice elevates the overall mouthfeel.
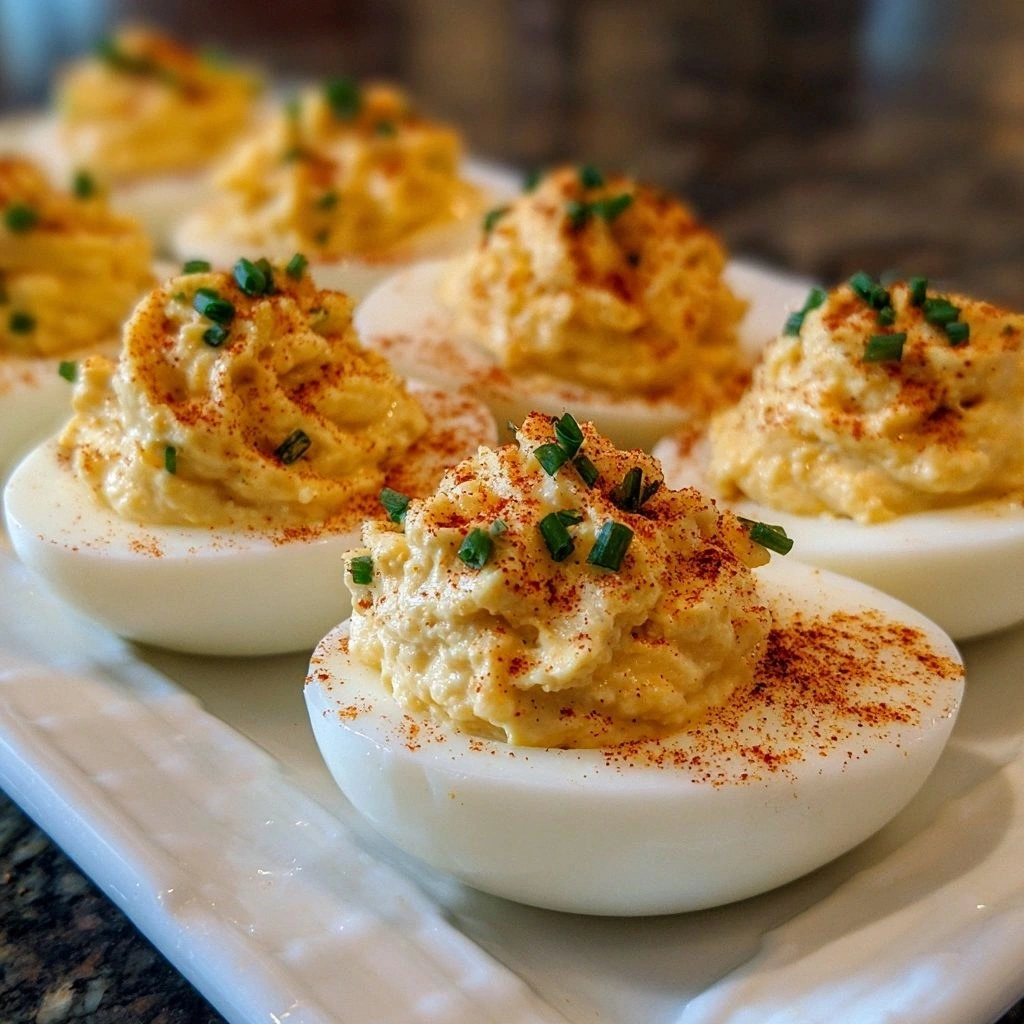
- Visual Appeal: The paprika dusting gives a subtle smoky hue that contrasts with the pale yolk. A sprinkle of chives adds a green pop that invites the eye. Together, they make the dish look as good as it tastes.
- Ingredient Quality: Fresh, high‑quality eggs and real Dijon mustard make the difference between good and great. The sharper the mustard, the more character it imparts. Quality ingredients are the secret sauce.
- Time Efficiency: The entire process takes under 30 minutes from start to finish. You can prep the filling while the eggs boil, saving precious time. It’s perfect for last‑minute entertaining.
- Make‑Ahead Friendly: The deviled eggs hold up well when stored in the fridge for up to 24 hours. The filling stays fresh and the whites remain firm. This makes it a stress‑free option for busy hosts.
- Audience Approval: Guests rave about the balanced taste and smooth texture. Even the most picky eaters can’t resist a bite. The recipe turns any gathering into a culinary success.
Inside the Ingredient List
The Flavor Base
Eggs are the star of the show, providing a rich, protein‑packed foundation that holds the filling together. The yolks, when mashed, release natural emulsifiers that bind the mayo and mustard into a silky mixture. Skipping eggs would turn the dish into a flat, unstructured spread. The yolks also carry the flavors of the seasonings, making them essential for depth.
Choosing large eggs ensures that you get enough yolk for a generous filling. Fresh eggs have a firmer texture that resists breaking when you cut them in half. If you use older eggs, the whites may become too soft, causing the halves to fall apart during assembly. For the best results, pick eggs that feel heavy and have a clean shell.
The Texture Crew
Mayonnaise is the creamy backbone of the filling. It adds moisture and a velvety mouthfeel that keeps the deviled eggs from drying out. Using a light or low‑fat mayo can reduce calories but may compromise the richness. The key is to balance the amount so the filling stays smooth yet not greasy.
Mustard contributes a sharp, bright bite that cuts through the richness of the mayo. Dijon mustard offers a subtle heat, while yellow mustard gives a milder flavor. A tablespoon is enough to give the filling a punch without overpowering. If you prefer a milder kick, reduce the amount slightly.
The Unexpected Star
Vinegar is the secret weapon that lifts the entire dish. A teaspoon of white wine or apple cider vinegar adds a bright acidity that balances the fat. It also helps the yolks hold their shape during cooking. Without vinegar, the filling can taste flat and overly creamy.
Salt and pepper are the subtle enhancers that tie all flavors together. A quarter teaspoon of salt is enough to season the filling without making it salty. A pinch of pepper adds a gentle warmth. Adjusting these to taste is simple, but be careful not to over‑salt.
The Final Flourish
Paprika is more than a garnish; it adds a smoky depth that lingers on the tongue. A light dusting gives a visual pop and a subtle flavor that complements the mustard. Smoked paprika can be used for a deeper, earthy taste. If you don’t have paprika, you can use a pinch of cayenne for heat.
Chives bring a fresh, oniony note that brightens the dish. They add a pop of color and a mild sharpness that contrasts with the creamy filling. Chives are optional, but they elevate the presentation. If you’re allergic to onions, you can replace them with finely chopped parsley.
Everything’s prepped? Good. Let’s get into the real action.
The Method — Step by Step
- Boil the Eggs: Fill a saucepan with enough water to cover the eggs by an inch. Bring it to a rolling boil, then reduce to a gentle simmer. Carefully lower the eggs using a slotted spoon to avoid cracking. Let them simmer for 9 minutes for medium‑hard eggs. This timing ensures firm whites and fully set yolks.
- Shock and Peel: Immediately transfer the eggs to a bowl of ice water to halt cooking. Let them sit for 5 minutes until they’re cool to the touch. Peel the shells gently, starting at the wider end. Keep the shells for compost or recycling. A cool egg is easier to handle and less likely to break.
- Slice and Scoop: Halve each egg lengthwise with a sharp knife. Use a spoon to scoop out the yolks into a mixing bowl. Keep the whites on a clean plate. The yolks should be pale yellow and slightly firm. The whites will be used as vessels for the filling.
- Make the Filling: Add mayonnaise, mustard, vinegar, salt, and pepper to the yolks. Mash the mixture with a fork until smooth. The filling should be creamy yet light. If it’s too thick, add a teaspoon of water or milk. If too runny, add a bit more mayo. The goal is a silky consistency.
- Fill the Whites: Spoon or pipe the yolk mixture back into the egg whites. Fill each half to the top for a neat presentation. Use a piping bag for a professional look, or a small spoon for a casual touch. The filling should sit flush with the white edge. This step is where the dish gets its final shape.
- Garnish: Sprinkle paprika over each filled egg. Add a few chopped chives for color and freshness. The paprika adds a smoky note that complements the mustard. The chives provide a bright, herbal contrast. This garnish transforms the dish from simple to spectacular.
- Chill: Place the deviled eggs in the refrigerator for at least 30 minutes before serving. The cold will set the filling and intensify the flavors. Keep them wrapped in a damp paper towel to prevent drying. Chill also helps the eggs hold their shape when served.
- Serve: Arrange the eggs on a platter for an elegant presentation. Offer a small bowl of extra mustard or a sprinkle of paprika for guests to customize their bites. The dish pairs wonderfully with a crisp salad or a light soup. Serve at room temperature for optimal flavor. Enjoy the applause that follows.
Insider Tricks for Flawless Results
The Temperature Rule Nobody Follows
The key to perfect deviled eggs lies in the temperature of the yolk mixture. If it’s too hot, the mayo will separate; if too cold, it won’t emulsify properly. Aim for a room‑temperature filling that’s slightly thicker than a peanut butter consistency. This allows the mixture to hold together when piped into the whites. A quick test: dip a spoon into the mixture and watch it glide smoothly.
Why Your Nose Knows Best
When you’re done mixing, give the filling a quick sniff. It should have a bright, slightly acidic aroma from the vinegar and mustard. If it smells overly buttery or flat, you’re missing the balance. The scent is a quick quality check that saves you from a bland final product.
The 5‑Minute Rest That Changes Everything
After filling the eggs, let them rest for 5 minutes before refrigerating. This short pause lets the flavors meld and the filling thicken. It also prevents the whites from becoming soggy. Think of it as a brief, delicious meditation for your deviled eggs.
Use a Silicone Spatula for a Smooth Finish
A silicone spatula is your best friend when mixing the yolks. It slides under the yolk without tearing the delicate membrane. A wooden spoon can break the yolk, causing lumps. The silicone tool also makes cleanup a breeze.
Keep the Whites Firm
If you notice the egg whites softening, wrap them in a damp paper towel before chilling. The moisture helps maintain firmness and prevents the whites from drying out. This is especially useful when you’re planning to serve the eggs the next day.
Add a Touch of Sweetness
A tiny pinch of sugar or honey can counterbalance the acidity from the vinegar and mustard. It’s a subtle trick that rounds out the flavor profile. Add it sparingly—one pinch is enough. This small change can make your deviled eggs feel more balanced.
With these tricks tucked into your culinary arsenal, you’re ready to produce deviled eggs that impress every time. The combination of precise timing, quality ingredients, and subtle seasoning creates a dish that’s both comforting and refined. Practice these steps, and you’ll soon find that the deviled eggs become a staple in your recipe repertoire.
Creative Twists and Variations
Spicy Sriracha Surprise
Swap the mustard for a tablespoon of sriracha for a fiery kick. The heat pairs well with the creamy mayo. Add a splash of lime juice for brightness. This version is perfect for guests who love a little spice.
Herb‑Infused Garden
Replace the chives with fresh dill and a pinch of lemon zest. The dill brings a fresh, almost citrusy flavor that complements the eggs. Sprinkle a few parsley leaves on top for an extra pop of green.
Cheesy Cheddar Crunch
Grate half a cup of sharp cheddar into the filling. The cheese adds a savory depth and a slight crunch when baked briefly. Toast the tops under a broiler for a golden finish. This is a crowd‑pleaser for cheese lovers.
Smoky Chipotle Twist
Add a teaspoon of chipotle in adobo for a smoky, earthy flavor. Replace paprika with a dash of smoked salt. The chipotle adds a subtle heat that lingers on the palate. Serve with a side of avocado for balance.
Citrus Burst
Mix in a teaspoon of orange zest and a splash of orange juice. The citrus brightens the filling and adds a sweet‑tangy note. Garnish with a thin slice of orange peel for an elegant look.
Avocado Cream
Blend half an avocado into the yolk mixture for a creamy, nutrient‑rich twist. The avocado adds a subtle buttery flavor and boosts the healthy fats. Finish with a sprinkle of sea salt and a dash of pepper.
This recipe is a playground. Here are some of my favorite ways to switch things up: each variation offers a new flavor profile that can cater to any palate, from spicy to sweet, from classic to adventurous. Experiment with these ideas, and you’ll keep your guests guessing and craving more.
Storing and Bringing It Back to Life
Fridge Storage
Store deviled eggs in an airtight container in the refrigerator for up to 24 hours. Keep the eggs on a paper towel to absorb excess moisture. This prevents the whites from becoming soggy. The filling stays creamy and fresh. Serve chilled for the best texture.
Freezer Friendly
You can freeze deviled eggs for up to one week. Wrap each half individually in plastic wrap, then place them in a freezer bag. Thaw overnight in the refrigerator before serving. The texture may slightly change, but the flavor remains intact. This is handy for prepping ahead of large events.
Best Reheating Method
If you need to warm them, gently place the eggs in a bowl of hot water for 3 minutes. Pat them dry before serving. Add a splash of water to the filling to keep it moist. This method preserves the creamy consistency. Avoid microwaving, which can make the eggs rubbery.
Add a tiny splash of water before reheating — it steams back to perfection. Keeping them chilled or slightly warmed preserves their texture and flavor. Remember to keep them covered until ready to serve to maintain freshness. With these simple storage tips, your deviled eggs can be a stress‑free party staple.