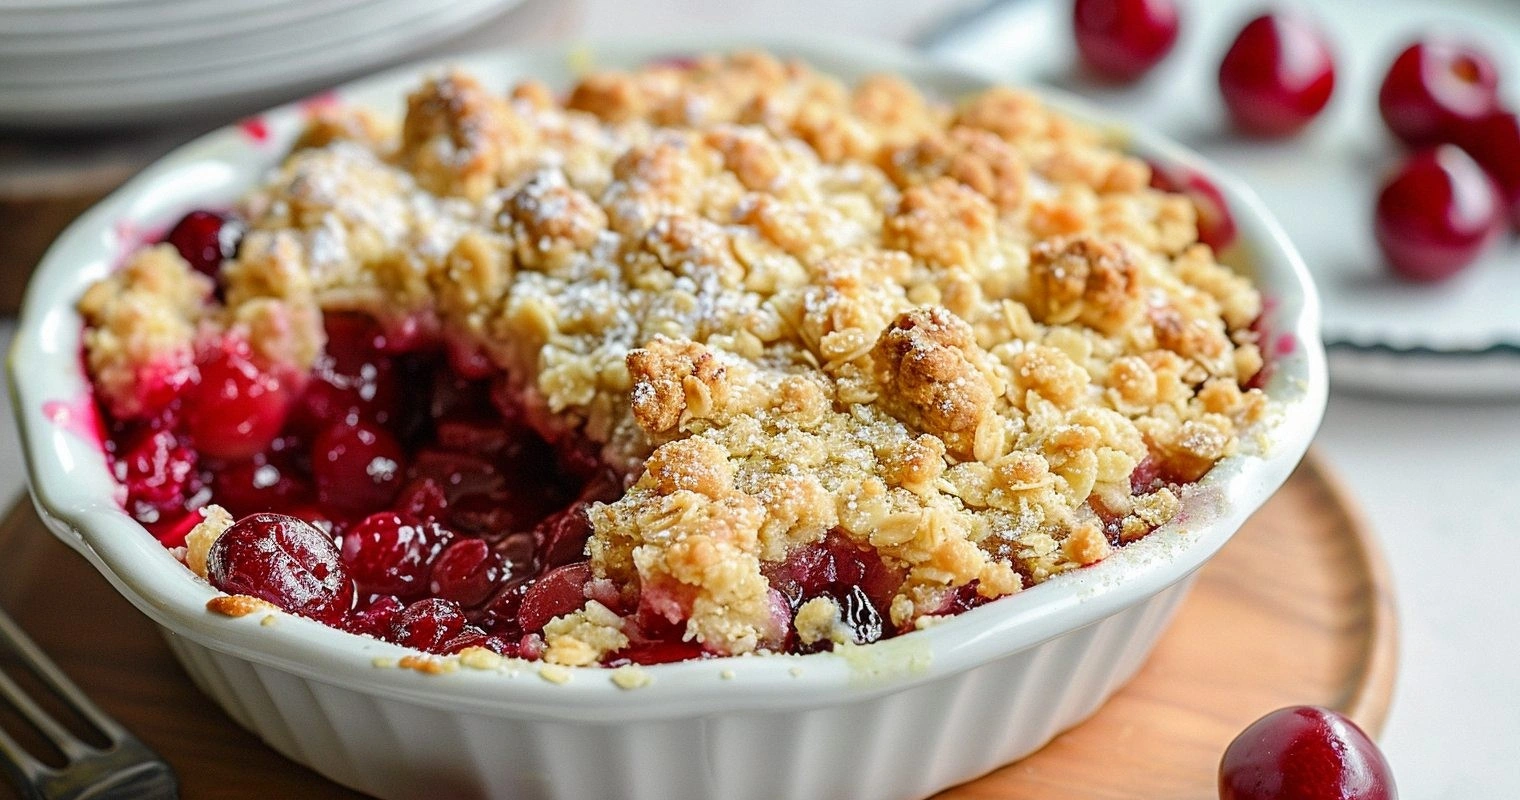
I dare you to taste this cherry crumble and not go back for seconds. I mean it. The first time I pulled this bubbling beauty from my oven, I burned my tongue because I couldn't wait five minutes for it to cool. Worth it. The tart cherries burst like tiny fireworks under a blanket of buttery, golden crumble that shatters like thin ice when your spoon breaks through. That moment when the warm fruit meets the crisp topping? Pure magic. I ate half the pan standing at my kitchen counter in my pajamas, and I have zero regrets.
Picture yourself pulling this out of the oven, the whole kitchen smelling like a summer afternoon even if it's the middle of winter. The scent of vanilla and butter drifts through the air while the cherries bubble up through the crumble like lava from a delicious volcano. That sizzle when the hot filling hits the cool spoon? Absolute perfection. My neighbor once knocked on my door at 9 PM because she could smell it from her house. That's the kind of power this dessert holds.
Most recipes get cherry crumble completely wrong. They either drown the fruit in too much sugar until you lose that bright, tangy punch, or they make the topping so thick and dry it might as well be gravel. Here's what actually works: letting the cherries speak for themselves with just enough sugar to balance their natural tartness, and creating a crumble that's equal parts crispy and tender, with little pockets that stay slightly chewy. The secret lies in one unexpected ingredient that transforms everything.
If you've ever struggled with soggy bottoms or burnt edges, you're not alone — and I've got the fix. This method guarantees a perfectly balanced crumble every single time, with no mysterious puddles of juice or sad, pale topping. The technique is foolproof, the ingredients are simple, and the result tastes like something you'd pay twelve dollars for at a fancy bakery. Stay with me here — this is worth it.
What Makes This Version Stand Out
Bold Cherry Flavor: Instead of masking the fruit under mountains of sugar, this recipe celebrates the natural tartness that makes cherries so special. The filling tastes like summer sunshine concentrated into pure cherry essence, bright and complex with hints of vanilla and lemon that make the fruit taste more like itself.
Textural Harmony: The crumble topping achieves that impossible balance between crispy and tender, with some bits that shatter like caramelized sugar and others that stay slightly chewy. Each spoonful gives you that satisfying crunch followed by the soft give of perfectly cooked fruit.
One-Bowl Simplicity: Despite tasting like you spent hours in the kitchen, this entire recipe comes together in one bowl and one baking dish. No fancy equipment, no complicated techniques — just honest ingredients transformed through smart ratios and timing.
Make-Ahead Magic: This crumble actually improves overnight as the flavors meld and deepen. You can prep it entirely in the morning, pop it in the fridge, and bake it fresh for dinner. Leftovers (if you have any) reheat beautifully for up to five days.
Year-Round Versatility: While fresh cherries in summer are incredible, this recipe works equally well with frozen cherries, making it a dessert you can crave and create any time of year. The technique adapts to whatever cherries you can find, adjusting sweetness based on their natural sugar levels.
Crowd-Pleasing Guarantee: I've served this to cherry skeptics and dessert snobs alike, watching their eyes widen with that first bite. Kids love it because it's essentially fruit candy, adults appreciate the sophisticated balance of flavors, and everyone fights over the crispy edges.
Alright, let's break down exactly what goes into this masterpiece...
Inside the Ingredient List
The Flavor Base
The cherries are obviously the star here, but not all cherries are created equal. Sweet cherries like Bing will give you a milder, honey-like flavor, while tart Montmorency cherries pack that lip-puckering punch that makes this dessert so addictive. If you're using fresh cherries, look for ones that are plump, shiny, and feel heavy for their size — that's how you know they're juicy. Frozen cherries actually work beautifully here because they're picked and frozen at peak ripeness, so don't feel like you're cheating if fresh aren't available. The key is tasting one before you start cooking; if it's mouth-puckeringly tart, you'll want the full amount of sugar, but if it's already quite sweet, dial it back by a quarter cup.
Granulated sugar does more than just sweeten — it helps draw out the cherry juices to create that gorgeous syrupy filling. Brown sugar adds depth and that subtle caramel note that makes people ask "what's in this?" Vanilla extract rounds everything out, creating those warm, bakery notes that make your kitchen smell like heaven. A pinch of salt might seem odd in a dessert, but it's crucial for balancing the sweetness and making the cherry flavor pop.
The Texture Crew
All-purpose flour forms the backbone of our crumble topping, creating those delightful nubby bits that catch the cherry juice and turn into little pockets of joy. Old-fashioned oats aren't just for health — they provide that hearty, nubby texture that makes each bite interesting, plus they toast beautifully in the oven. Cold butter is non-negotiable here; it's what creates those flaky, crispy layers in the topping. When the cold butter hits the hot oven, the water inside turns to steam, creating tiny pockets that make the crumble light and crisp rather than dense and heavy.
Chopped nuts add another layer of texture and flavor — I like almonds because they complement cherries beautifully, but walnuts or pecans work too. The nuts toast as the crumble bakes, releasing their oils and becoming incredibly fragrant. If you're nut-free, you can substitute with extra oats or even some toasted coconut flakes for a different but equally delicious twist.
The Unexpected Star
Here's where this recipe diverges from every other cherry crumble out there: a tablespoon of balsamic vinegar. Stay with me here — this is worth it. The vinegar's acidity brightens the cherry flavor in a way that lemon juice can't quite achieve, adding complexity without making it taste like salad dressing. It's the secret ingredient that makes people say "I can't quite place what's different, but this is the best cherry crumble I've ever had." The vinegar cooks off in the oven, leaving behind just this incredible depth of flavor that makes the cherries taste more like themselves.
Almond extract is another game-changer — just a quarter teaspoon amplifies the natural almond notes in cherries (they're botanical cousins, did you know?). It's subtle but transformative, like adding a filter to a photo that makes all the colors more vibrant. If you don't have almond extract, you can skip it, but I highly recommend keeping a small bottle in your pantry for moments like this.
The Final Flourish
Lemon zest and juice serve multiple purposes here. The zest adds bright, citrusy notes that lift the whole dessert, while the juice prevents the cherries from browning and helps balance their natural sweetness. Don't skip this — it's the difference between a good crumble and a great one. The lemon should enhance, not dominate, so use a light hand.
A touch of cornstarch thickens the cherry juices as they bubble, transforming what would be a watery mess into that perfect, spoon-coating sauce. If you're using particularly juicy cherries or frozen ones that release more liquid, you might need an extra teaspoon. The filling should coat your spoon like velvet when you test it — that's how you know you've got the right consistency.
Everything's prepped? Good. Let's get into the real action...
The Method — Step by Step
- Start by preheating your oven to 375°F (190°C). This temperature is crucial — hot enough to cook the cherries quickly without turning them to mush, but not so hot that the topping burns before the filling bubbles. While the oven heats, place your baking dish (I love using a 9-inch ceramic or glass dish) in there to warm up. This little trick helps the bottom of the crumble start cooking immediately, preventing that dreaded soggy base that ruins so many otherwise perfect desserts. The dish should feel warm but not scorching when you remove it with oven mitts.
- Now for the fun part: pitting your cherries. If you have a cherry pitter, great — but if not, a sturdy straw or even a chopstick works beautifully. Hold the cherry over a bowl and push the pitter through, catching the cherry and juice in the bowl below. This is messy work, so wear an apron and embrace the carnage. I like to listen to music and make it a meditative process, but if you're in a hurry, frozen pre-pitted cherries are your best friend. The goal is about 4 cups of pitted cherries, which translates to roughly 2 pounds with pits.
- In a large bowl, toss the cherries with sugar, cornstarch, lemon juice and zest, vanilla, almond extract, balsamic vinegar, and salt. Use your hands here — they distribute everything more evenly than a spoon, and you can feel if any sugar pockets remain. The mixture will look almost too juicy at first, but that's perfect. Let it sit for 10 minutes while you make the topping; this resting time allows the sugar to draw out the cherry juices and start dissolving the cornstarch. When you return, you'll notice the cherries have released a beautiful ruby syrup that smells incredible.
- For the crumble topping, combine flour, oats, brown sugar, and salt in the same bowl (no need to dirty another one). Cut in the cold butter using a pastry blender or your fingertips until the mixture resembles coarse crumbs with some pea-sized pieces remaining. These larger butter bits are what create those irresistible pockets of crispy, buttery goodness. Stir in the chopped nuts last, just until combined — overmixing can make the nuts release their oils and turn the topping greasy.
- Remove your warm baking dish from the oven and immediately pour in the cherry filling. It should sizzle slightly as it hits the hot ceramic — that's the sound of success. Spread the fruit into an even layer, but don't press down; you want those little pockets where the topping can nestle into the fruit. The filling should come about halfway up the sides of the dish, leaving room for the topping and bubbling.
- Sprinkle the crumble topping evenly over the cherries, making sure to get it right to the edges. Don't press it down — those air pockets are crucial for even cooking. The topping should completely cover the fruit, like a cozy blanket that will transform into golden, crispy perfection. If you like extra-crispy edges, mound the topping slightly higher around the edges where it will brown first.
- Bake for 35-40 minutes, but here's the key: place the dish on a baking sheet to catch any overflow, and don't open the oven door for the first 25 minutes. The filling needs to reach a rolling boil to properly thicken, and peeking too early drops the temperature. You'll know it's ready when the topping is deep golden brown, the filling is bubbling up through the cracks, and your kitchen smells like a cherry festival. The edges will be darker than the center — that's perfect, not burnt.
- Now comes the hardest part: waiting. Let the crumble rest for at least 15 minutes before serving. I know, I know — those warm cherries are calling your name. But this resting time allows the filling to set properly, transforming from liquid lava to that perfect, spoon-coating consistency. The topping also crisps up as it cools slightly, achieving that perfect contrast between crunchy and juicy.
- Serve warm with vanilla ice cream that melts into all the nooks and crannies, creating rivers of creamy sweetness that complement the tart cherries perfectly. A dollop of whipped cream works too, but there's something magical about the way ice cream melts into the warm fruit, creating temperature and texture contrasts that make each bite interesting. Don't skip this final flourish — it's what transforms a simple fruit dessert into something restaurant-worthy.
- Storage is straightforward: cover any leftovers and refrigerate for up to 5 days. The topping will soften slightly in the fridge, but a quick reheat in the oven or microwave brings back most of the crispness. For longer storage, individual portions freeze beautifully for up to 3 months. Just wrap them well and reheat from frozen at 350°F for about 20 minutes, adding a splash of water to keep things juicy.
That's it — you did it. But hold on, I've got a few more tricks that'll take this to another level...
Insider Tricks for Flawless Results
The Temperature Rule Nobody Follows
Here's what separates good bakers from great ones: understanding how temperature affects texture. Your butter should be cold enough that it feels firm when you press it, but not so cold that it shatters when you cut it. I leave mine in the fridge until I'm ready to use it, then cube it quickly. If your kitchen is warm, pop the bowl of topping in the freezer for 10 minutes before baking — this ensures those perfect pockets of steam that create flaky layers. A friend tried skipping this step once and ended up with a dense, greasy topping that tasted like wet cardboard. Don't be that friend.
Why Your Nose Knows Best
Trust your sense of smell more than the timer. When the crumble is perfectly done, your kitchen will smell like butterscotch and toasted nuts with bright cherry notes dancing underneath. If you smell burning, you've gone too far. If you don't smell anything yet, give it more time. This aromatic checkpoint happens about 2-3 minutes before visual doneness, giving you time to adjust. I've saved countless desserts by paying attention to what my nose was telling me rather than blindly following a timer.
The 5-Minute Rest That Changes Everything
I know you're tempted to dig in immediately, but those five extra minutes of patience pay off in ways you can't imagine. During this brief rest, the filling transforms from watery to syrupy as the cornstarch fully activates, and the topping reaches its peak crispness. The temperature also drops to that perfect point where you can taste all the flavors — too hot and your taste buds can't register the subtle notes. Think of it like letting a good wine breathe, except in this case, the wine is cherry lava and the breathing makes it perfect.
The Cherry Selection Secret
Not all cherries are created equal, and knowing how to pick them makes or breaks this dessert. Fresh cherries should feel heavy for their size and have glossy, taut skin. If they're shriveled or soft, skip them — they'll bake down to mush. For frozen cherries, look for bags where the cherries move freely, not in one solid block (that indicates they've been thawed and refrozen). Taste one if you can — it should make your mouth pucker slightly but not be inedibly sour. The best cherry crumble uses a mix of sweet and tart cherries if you can find them, creating layers of flavor that keep you coming back for "just one more bite."
The Make-Ahead Miracle
This crumble is actually better when made ahead, which feels like cheating but tastes like winning. Assemble everything up to the point of baking, cover tightly, and refrigerate for up to 24 hours. The flavors meld and deepen, creating a more complex, restaurant-quality dessert. When you're ready to bake, add 5-10 extra minutes to account for the cold dish. The topping also benefits from this rest, becoming more cohesive and crispy. I've served this at dinner parties after making it the night before, and guests always assume I spent hours that day in the kitchen.
Creative Twists and Variations
This recipe is a playground. Here are some of my favorite ways to switch things up:
Almond Cherry Crunch
Replace half the flour with ground almonds and add a teaspoon of almond extract to the topping. The result tastes like a cherry frangipane tart but with that irresistible crumble texture. Use sliced almonds instead of chopped for extra crunch, and drizzle the finished crumble with a simple almond glaze made from powdered sugar and milk. This version tastes like something you'd find in a Parisian patisserie but takes a fraction of the effort.
Spiced Winter Warmer
Add a teaspoon of ground cardamom and a half teaspoon of black pepper to the filling. These warming spices transform summer cherries into a cozy winter dessert that tastes like holiday spices had a baby with cherry pie. Serve it warm with a scoop of cinnamon ice cream for a dessert that'll make you forget it's cold outside. The pepper adds just enough heat to make the spices sing without being obvious.
Cherry Port Elegance
Replace two tablespoons of the cherry juice with ruby port wine. The port adds incredible depth and richness, turning humble cherries into something worthy of a special occasion dinner party. Reduce the sugar slightly to account for the port's sweetness, and add a strip of orange zest to the filling. This version pairs beautifully with a glass of the same port served alongside.
Coconut Cherry Dream
Substitute half the butter with coconut oil and add a half cup of shredded coconut to the topping. The coconut toasts as it bakes, creating these incredible crispy bits that taste like the best parts of a cherry coconut macaroon. Use coconut sugar instead of brown sugar for even more depth, and serve with coconut milk ice cream for a dairy-free version that doesn't sacrifice any richness.
Bourbon Cherry Bomb
Add two tablespoons of good bourbon to the filling along with a tablespoon of brown sugar. The bourbon cooks off, leaving behind these incredible vanilla and caramel notes that make the cherries taste like they were kissed by an angel. Use a bourbon you'd actually drink — the cheap stuff will taste harsh and chemical. This version is especially good with a scoop of vanilla bean ice cream and a drizzle of bourbon caramel sauce.
Breakfast Cherry Crumble
Make it acceptable for breakfast by reducing the sugar by a third and adding a half cup of granola to the topping. Serve it warm over Greek yogurt with a drizzle of honey. The tart cherries and tangy yogurt create a breakfast that feels indulgent but actually packs protein and fruit. My kids think they're getting away with something when I serve this on weekend mornings.
Storing and Bringing It Back to Life
Fridge Storage
Let the crumble cool completely before covering — trapping heat creates condensation that turns the topping soggy. Store in the original dish covered with foil, or transfer to an airtight container. It keeps beautifully for up to 5 days, though the topping will gradually soften. To restore crispness, reheat individual portions in a 350°F oven for 10-12 minutes, or use a toaster oven if you have one. The microwave works in a pinch, but it won't revive the crispy texture — think of it as warm cherry compote with crumble bits rather than the full experience.
Freezer Friendly
This crumble freezes like a dream, making it perfect for meal prep or unexpected guests. Cool completely, then wrap individual portions tightly in plastic wrap followed by foil, or freeze the whole dish. It keeps for up to 3 months without significant quality loss. To reheat, thaw overnight in the fridge if frozen, then warm in a 350°F oven until heated through. For a whole frozen crumble, cover with foil for the first 20 minutes to prevent over-browning, then remove for the final 10 minutes to crisp the topping. The texture won't be quite as perfect as fresh-baked, but it's still miles better than most desserts.
Best Reheating Method
The oven is your friend here — microwaves turn the topping rubbery and the filling watery. For individual portions, place in an oven-safe dish, add a tiny splash of water (this creates steam that rehydrates the filling), cover with foil, and heat at 350°F for 12-15 minutes. Remove the foil for the final 3 minutes to crisp the topping. For a whole crumble, add a tablespoon of water around the edges before covering with foil. The edges tend to dry out first, so check them and add a bit more water if needed. Serve immediately with fresh ice cream, and your guests will never know it wasn't baked that day.