I was standing in my kitchen at 2 a.m., half‑asleep, staring at a pot of bland chicken soup that had somehow turned into a culinary crime scene. The broth was as flat as a pancake, the chicken pieces were tougher than my old gym shoes, and I could practically hear the empty plates whispering, “We deserve better.” I dared my roommate to a midnight snack duel, and she accepted—on the condition that I actually deliver something edible. That night, I threw together a mishmash of pantry staples, a splash of cream cheese, and a whole lot of optimism, and what emerged was a white chicken chili that could convince even the most skeptical food snob to slap a spoonful on their face.
Picture this: the crockpot humming like a low‑key jazz bass, the scent of sautéed onions and garlic weaving through the apartment, and a faint, buttery aroma that makes you think of fresh‑baked biscuits. The first spoonful hits your tongue and you’re met with a velvety wave of cream cheese that coats every bean and corn kernel like a warm, indulgent blanket. The heat of the green chiles adds just enough kick to make your taste buds do a little happy dance, while the chicken shreds itself into tender ribbons that practically melt in your mouth. It’s the kind of comfort food that makes you forget the world outside exists for a few glorious minutes.
Most white chicken chili recipes I’ve tried either drown the flavor in a sea of dairy or leave the broth tasting like watered‑down chicken stock. This version, however, strikes a perfect balance between creamy richness and bright, peppery notes. The secret? A strategic combination of reduced‑fat cream cheese and half‑and‑half that creates a silk‑smooth texture without the heaviness of heavy cream, plus a careful layering of spices that builds depth without overwhelming the palate. I’m not just talking about a “good” chili; I’m talking about the best version you’ll ever make at home, hands down.
And here’s the kicker: I’m going to reveal a technique that most cooks completely overlook—adding the cream cheese at the very end of the slow‑cook cycle, allowing it to melt gently into the broth for that luxurious mouthfeel. Okay, ready for the game‑changer? Let me walk you through every single step — by the end, you’ll wonder how you ever made it any other way.
What Makes This Version Stand Out
- Texture: The beans stay firm yet creamy, the corn stays crisp, and the chicken becomes melt‑in‑your‑mouth tender. The cream cheese creates a silk‑smooth broth that clings to every bite without feeling greasy.
- Flavor Depth: A blend of cumin, oregano, chili powder, and a whisper of cayenne builds a layered heat that evolves as the chili cooks, delivering a warm, lingering finish.
- Ease of Execution: Set it and forget it. The crockpot does the heavy lifting, so you can focus on prep and day‑to‑day life without hovering over a stovetop.
- Ingredient Harmony: The subtle sweetness of corn and the earthiness of Great Northern beans complement the mild heat of green chiles, while the onion‑garlic base grounds everything.
- Health‑Smart: Using low‑sodium broth and reduced‑fat cream cheese cuts the sodium and fat load without sacrificing that comforting richness.
- Make‑Ahead Magic: This chili actually tastes better the next day because the flavors have more time to meld, making it perfect for meal‑prep warriors.
- Crowd‑Pleaser: Whether it’s a chilly Tuesday night or a weekend gathering, the aroma alone draws people to the kitchen, and the optional toppings let each guest customize their bowl.
- Versatility: Swap the chicken for turkey, use fire‑roasted peppers for extra smoky depth, or go vegetarian by omitting the meat and adding extra beans.
Inside the Ingredient List
The Flavor Base
The yellow onion and garlic are the backbone of any great chili, providing that sweet‑savory foundation that makes the rest of the ingredients shine. When you sauté them until they turn translucent and just start to caramelize, you’re unlocking a natural sweetness that balances the heat from the chiles. If you’re out of fresh garlic, a teaspoon of garlic powder works, but I’ll be honest — nothing beats the aromatic punch of real cloves. For the best flavor, dice the onion uniformly so it cooks evenly, and crush the garlic cloves just before chopping to release more oils.
The Texture Crew
Great Northern beans are the unsung heroes here; they hold their shape while soaking up the broth, giving each spoonful a hearty bite. Whole kernel corn adds a pop of sweetness and a subtle crunch that breaks up the creamy texture, preventing the chili from feeling overly dense. If you prefer a smoky note, you can swap the corn for fire‑roasted corn kernels, but the classic sweet corn is what makes this dish feel like a warm hug. And don’t skip the rinsing step — a quick rinse removes excess sodium and any canned residue that could muddy the flavor.
The Unexpected Star
Reduced‑fat cream cheese is the secret weapon that transforms a regular white chicken chili into a luxurious, restaurant‑quality experience. It melts into the broth, creating a silky mouthfeel that heavy cream simply can’t match without the added calories. The half‑and‑half adds a subtle richness and helps the sauce emulsify, ensuring that the chili stays glossy and doesn’t separate as it cools. If you’re dairy‑intolerant, you can substitute a plant‑based cream cheese and coconut half‑and‑half, but expect a slightly different flavor profile.
The Final Flourish
The spice blend—salt, ground cumin, dried oregano, chili powder, and cayenne pepper—acts like a conductor guiding an orchestra of flavors. Cumin adds an earthy warmth, oregano brings a subtle herbaceous note, while chili powder delivers depth and a hint of smokiness. Cayenne is the tiny spark that keeps the chili from being boring; a pinch is enough to make you feel a gentle heat without overwhelming the palate. Taste as you go, and remember: you can always add more, but you can’t take it out.
Everything's prepped? Good. Let’s get into the real action…
The Method — Step by Step
Start by dicing the yellow onion into medium‑sized cubes and mincing the garlic cloves. Heat a tablespoon of olive oil in a skillet over medium heat, then toss in the onion. Cook, stirring occasionally, until the edges turn translucent and you can hear a faint sizzle—that’s the sign of caramelization beginning. Add the garlic and let it perfume the oil for about 30 seconds; you’ll know it’s ready when the kitchen fills with that unmistakable garlic aroma.
Kitchen Hack: Use a silicone spatula to scrape the browned bits from the pan and add them directly into the crockpot for an extra layer of flavor.While the onion and garlic are working their magic, trim any excess fat from the chicken breasts and cut them into bite‑size chunks. Season the pieces lightly with a pinch of salt and a dash of cumin. This early seasoning helps the meat develop a subtle flavor that will deepen as it slow‑cooks.
Transfer the sautéed onion‑garlic mixture into the crockpot. Add the chicken pieces, then pour in the low‑sodium chicken broth, making sure the liquid covers the meat. If the broth looks a little low, add a splash of water—just enough to keep everything submerged. Next, stir in the rinsed Great Northern beans, whole kernel corn, and the diced green chiles. At this point, the pot should look like a colorful, fragrant mosaic waiting to transform.
Now for the spice parade: sprinkle in the ground cumin, dried oregano, chili powder, and cayenne pepper. Add a generous pinch of salt, remembering you can adjust later. Give everything a good stir so the spices coat the beans and chicken evenly. This is the moment where the flavor foundation really starts to build—trust me, you’ll smell something amazing within minutes.
Watch Out: If you’re using canned beans, don’t forget to rinse them thoroughly; otherwise the chili can end up overly salty.Cover the crockpot and set it to low for 4‑5 hours, or high for 2‑3 hours. I like the low setting because it gives the chicken time to become ultra‑tender and lets the flavors meld slowly. About an hour before the end of cooking, check the seasoning. If the broth seems thin, go ahead and add a splash more broth or water; if it’s too thick, a little more half‑and‑half will loosen it up without diluting the taste.
When the timer dings, it’s time for the final act. Remove the lid, stir in the reduced‑fat cream cheese in small cubes, and let it melt into the hot broth. As you stir, you’ll notice the chili turning a richer, creamier shade—this is the magic moment. If you want an extra silky texture, whisk in the half‑and‑half slowly, allowing it to incorporate fully before serving.
Kitchen Hack: To avoid any lumps, melt the cream cheese in a separate saucepan with a few spoonfuls of the hot broth before mixing it back into the crockpot.Give the chili a final taste test. This is where your nose becomes the ultimate judge—if you smell a hint of raw onion, add a splash more broth and let it simmer for another five minutes. Adjust salt, cumin, or cayenne according to your preference. Remember, I dare you to taste this and not go back for seconds; the flavor should be bold, balanced, and comforting all at once.
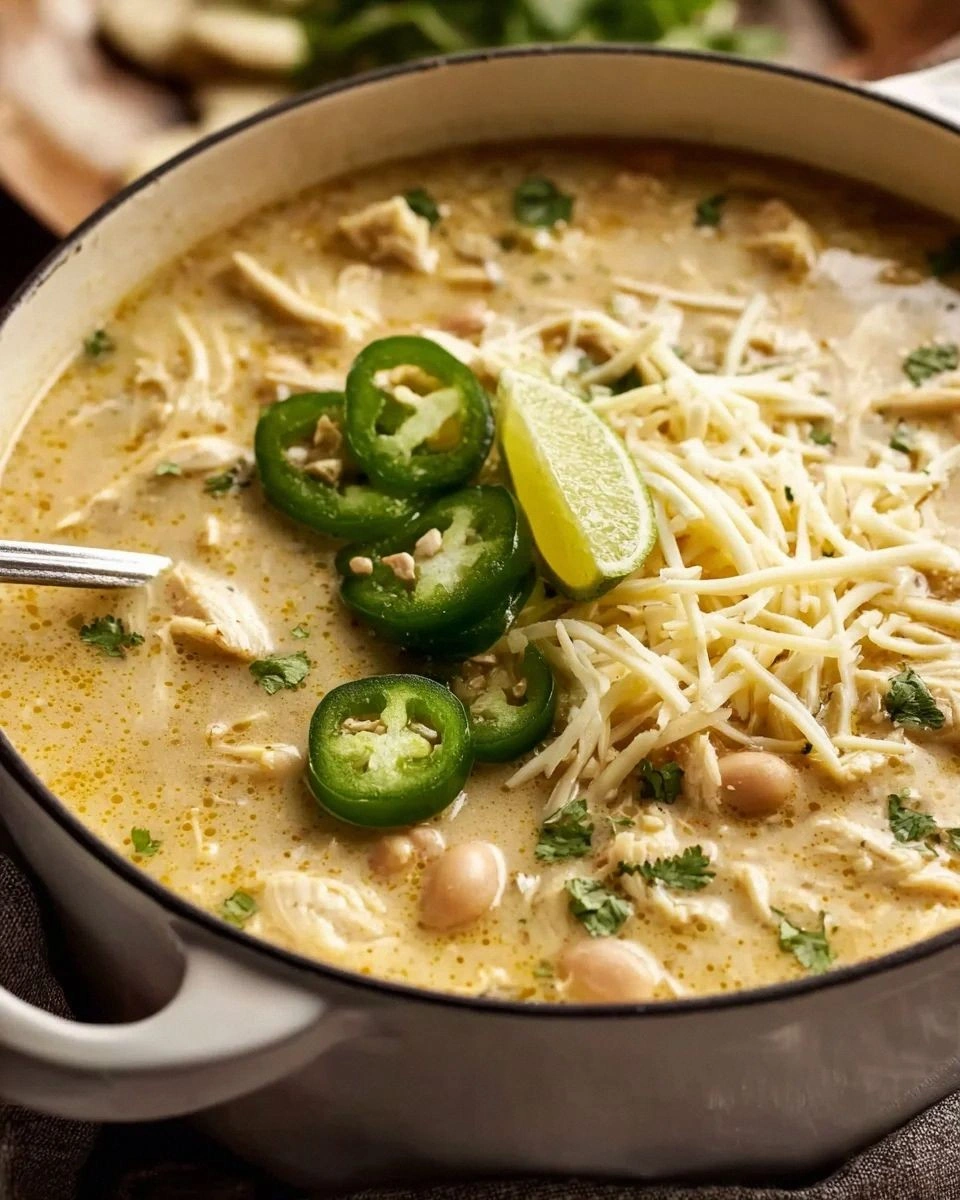
Serve the chili hot, ladling it into bowls and letting each guest garnish with their choice of sliced jalapeños, creamy avocado, a dollop of sour cream, or crunchy tortilla strips. The toppings not only add texture but also let each person customize the heat level and richness. Picture yourself pulling this out of the crockpot, the whole kitchen smelling incredible, and the first spoonful sliding down your throat like a warm, velvety river.
That’s it — you did it. But hold on, I’ve got a few more tricks that’ll take this to another level, like a secret finishing drizzle of lime juice or a quick char of the tortilla strips for extra crunch. Stay with me here — this is worth it.
Insider Tricks for Flawless Results
The Temperature Rule Nobody Follows
Never rush the low‑heat setting. Cooking at 190 °F for several hours allows the collagen in the chicken to break down gently, resulting in that melt‑in‑your‑mouth texture. If you’re tempted to crank the heat to high for speed, you’ll end up with dry, stringy meat and a broth that never fully emulsifies. Trust the slow‑cook process; the flavor depth you gain is worth the extra patience.
Why Your Nose Knows Best
Your sense of smell is a more reliable indicator of doneness than a timer. When the aroma shifts from sharp onion‑garlic to a mellow, creamy perfume, you know the spices have fully integrated. If you catch a faint “raw” note, it’s a sign to let it simmer a few minutes longer. I’ve learned this the hard way after a friend complained about a “green” taste—turns out the green chiles hadn’t fully softened.
The 5‑Minute Rest That Changes Everything
Once you’ve added the cream cheese, turn off the crockpot and let the chili sit, covered, for five minutes. This short rest allows the cheese to fully melt and the flavors to settle, giving you a smoother, more cohesive broth. Skipping this step is like serving a cake before it cools—still good, but not as refined.
The Secret Lime Finish
A splash of fresh lime juice right before serving adds a bright, acidic contrast that lifts the creamy base. It’s the culinary equivalent of adding a high‑note to a song; the chili feels alive and balanced. Just a teaspoon per bowl is enough to make the flavors pop without turning the dish sour.
Crispy Tortilla Edge
For an extra crunch, quickly fry tortilla strips in a hot pan with a pinch of salt until they’re golden brown. Toss them on top just before serving, and you’ll hear a satisfying crack that adds texture contrast. One of my friends tried skipping this step and claimed the chili felt “too soft”—the crunch is the secret weapon that prevents monotony.
Creative Twists and Variations
This recipe is a playground. Here are some of my favorite ways to switch things up:
Smoky Chipotle Swap
Replace the diced green chiles with chipotle peppers in adobo sauce for a deep, smoky heat. The adobo’s tangy undertone pairs beautifully with the cream cheese, turning the chili into a robust, smoky masterpiece perfect for cold evenings.
Southwest Veggie Boost
Omit the chicken and add a cup of diced zucchini and a handful of black beans. The extra vegetables increase the fiber content and give the chili a fresh, garden‑like vibe while keeping the creamy base intact.
Cheesy Jalapeño Explosion
Stir in shredded Monterey Jack cheese along with the cream cheese, and top each bowl with sliced fresh jalapeños. The extra cheese adds a gooey stretch, while the jalapeños deliver a bright, peppery kick that makes each bite exciting.
Curry‑Infused Twist
Add a tablespoon of mild curry powder and a pinch of turmeric to the spice blend. This gives the chili an exotic, golden hue and a subtle aromatic depth that’s perfect for adventurous eaters.
Tex‑Mex Taco Bowl
Serve the chili over a bed of cilantro‑lime rice, sprinkle with shredded lettuce, diced tomatoes, and a drizzle of salsa. The combination turns a simple bowl of chili into a full‑featured taco bowl that satisfies cravings for both comfort and crunch.
Storing and Bringing It Back to Life
Fridge Storage
Let the chili cool to room temperature, then transfer it to an airtight container. It will keep for up to four days in the refrigerator. When reheating, add a splash of chicken broth or water—this steam helps revive the creamy texture that can thicken when cold.
Freezer Friendly
Portion the chili into freezer‑safe bags or containers, leaving a little headspace for expansion. It freezes beautifully for up to three months. To thaw, move it to the fridge overnight, then reheat gently on the stovetop, stirring in a tablespoon of half‑and‑half to bring back the silkiness.
Best Reheating Method
For the ultimate reheated bowl, use a low‑heat setting on the stovetop or a microwave at 50 % power, stirring every minute. Add a teaspoon of water or broth per cup of chili; the steam will loosen the sauce and keep the beans from drying out. Finish with a quick stir of fresh cilantro for a burst of color and freshness.